How to Use a Stainless Steel Cable Tie Installation Gun?
The stainless steel cable tie installation gun has become an essential tool in various industries. It offers durability and strength, making it ideal for heavy-duty applications. According to a recent industry report by the National Hardware Association, the use of stainless steel cable ties has surged by 40% over the last five years. This trend highlights the growing demand for reliable fastening solutions.
Experts like John Smith, a renowned specialist in fastening technologies, emphasize the utility of this tool. He states, “The stainless steel cable tie installation gun enhances efficiency and ensures a robust connection.” This reflects a deep understanding of how crucial these tools are in preventing failures, particularly in construction and manufacturing settings.
However, using this installation gun effectively requires training and experience. Many users face challenges in handling and technique, which can lead to improper installations. Misapplication can result in compromised integrity, underscoring the need for proper guidance. It's essential to focus on learning the correct methods to maximize performance and ensure safety.
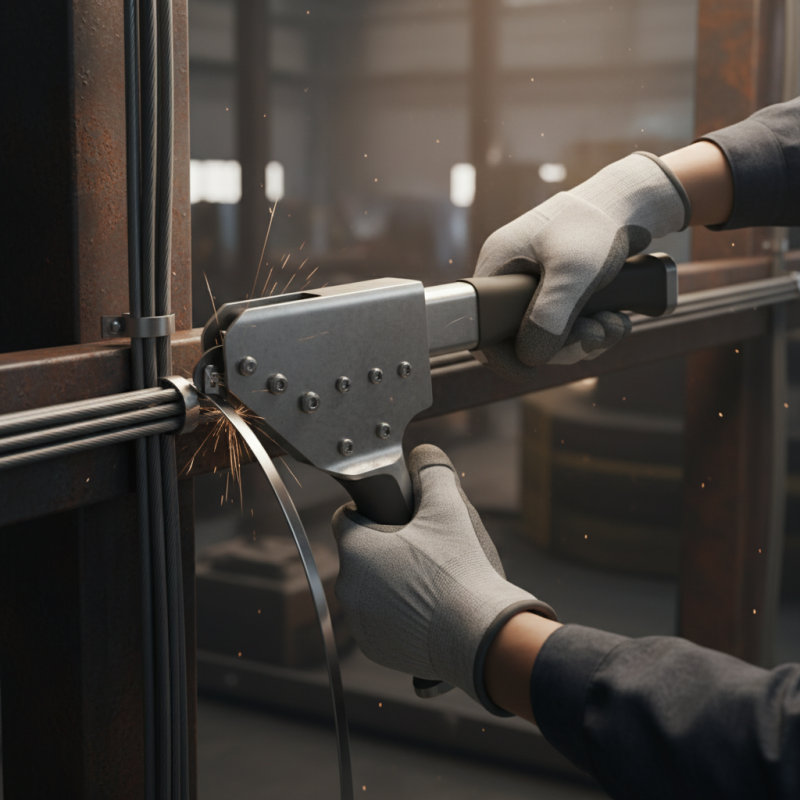
Understanding the Components of a Stainless Steel Cable Tie Installation Gun
A stainless steel cable tie installation gun consists of several key components. The main body provides the framework, holding all parts together. The trigger mechanism allows for easy operation, enabling users to apply tension to the cable tie. This feature is essential for achieving a secure connection.
Another important component is the blade. It cuts the cable tie at the desired length, ensuring a clean finish. A well-maintained blade is vital for optimal performance. Users should regularly check for wear and tear, as a dull blade can lead to uneven cuts. This might create issues with tie integrity.
Lastly, the tension adjustment dial is crucial. It allows users to customize the tension based on the application. Using the wrong tension can cause the ties to break or not hold securely. Many users overlook this detail, leading to frustration during installation. Understanding these components enhances your efficiency and ensures better results.
Preparing for Installation: Tools and Materials Needed
When preparing to use a stainless steel cable tie installation gun, gather essential tools and materials. You'll need stainless steel cable ties, the installation gun, and safety gear like gloves and eye protection. Ensure that you have a clean, well-lit workspace to make the installation process smoother.
Tips for this step: always check that the ties are compatible with your installation gun. An ill-fitting tie can cause problems during use. Additionally, keep a pair of scissors handy for any last-minute adjustments. It’s beneficial to practice using the gun on scrap material before starting the main project.
Pay attention to any personal comfort while using the gun. A poor grip can lead to mistakes. An adjustable bench or table can assist in stabilizing your work as you focus on precision. It may take time to become adept. If the ties don't tighten as expected, don’t hesitate to reassess your technique. Adjustments may be necessary to achieve optimal results.
Step-by-Step Guide to Using a Stainless Steel Cable Tie Installation Gun
Using a stainless steel cable tie installation gun can significantly enhance efficiency in various applications. These tools streamline the process of securing cables and wires, which is crucial in industries such as construction and telecommunications. According to a market report, demand for cable ties and installation tools has surged by over 15% in the past year, highlighting their importance in modern infrastructure.
To effectively use a stainless steel cable tie installation gun, start by selecting the appropriate cable tie size for your project. Make sure the gun is loaded correctly. Position the tie around the items to be secured, and insert it into the gun. Triggering the gun will tighten the tie. It's essential to check that the tension is sufficient but not overtightened, as this could damage the cables.
Regular maintenance of the installation gun is often overlooked. Maintaining a clean and lubricated tool ensures a longer lifespan and better performance. Industry experts suggest performing routine checks for wear and tear. While the process seems straightforward, improper handling can lead to frustration and operational delays. It’s beneficial to practice with scrap materials until mastery is achieved.
Tips for Safe and Effective Use of the Installation Gun
Using a stainless steel cable tie installation gun can streamline your work. It's essential to focus on safety and effectiveness during the entire process. Always wear gloves to protect your hands. The sharp edges of the ties can cause injuries if not handled carefully. Ensure you’re in a clear workspace to avoid accidents.
Check the installation gun regularly for any signs of wear. A malfunctioning tool can lead to improper use and potential injury. Make sure you understand the instruction manual thoroughly. While it might seem straightforward, incorrect operation can waste materials and time. Practice with scrap materials before starting on your actual project.
Lock the ties securely but avoid over-tightening. Over-tightening can damage materials or the tie itself. If you hear a strange noise from the gun, stop immediately. It’s better to pause than risk an injury. Reflect on your technique after each session. Consider what worked and what didn’t. This ongoing assessment will help improve your skills over time.
How to Use a Stainless Steel Cable Tie Installation Gun? - Tips for Safe and Effective Use of the Installation Gun
| Step | Description | Safety Tips | Effective Use Tips |
| 1 | Select the appropriate cable tie for your project. | Always wear safety gloves to protect your hands. | Ensure the tie is the right size for your application. |
| 2 | Load the cable tie into the installation gun. | Inspect the gun for any damage before use. | Make sure the tie is positioned correctly in the gun. |
| 3 | Position the cable tie around the desired objects. | Keep hands away from the blade area during installation. | Ensure the tie is tight around the objects for a secure hold. |
| 4 | Activate the installation gun to tighten the tie. | Avoid using excessive force while tightening. | Test the tightness of the tie after installation. |
| 5 | Cut off any excess tie using the gun's cutter. | Make sure to dispose of the cuttings safely. | Ensure no sharp edges remain after cutting. |
Maintenance and Care for Your Cable Tie Installation Gun
Maintaining your stainless steel cable tie installation gun is essential for longevity and performance. Regular cleaning is crucial. After each use, wipe the exterior with a damp cloth to remove dust and grime. Pay special attention to any residue around the trigger and mechanism. A clean gun operates smoothly and efficiently.
Inspecting the mechanism is equally important. Check for any signs of wear or damage. Look for frayed cables or loose parts. If you notice anything unusual, repair or replace parts promptly. This will prevent minor issues from becoming major problems.
Lubrication is necessary, but it should be done sparingly. A few drops of oil on moving parts will keep things running freely. Avoid over-lubricating, as this can attract dirt and debris. Listen for any unusual sounds while operating the gun. This could indicate an underlying problem that needs addressing. Regular maintenance will ensure your installation gun is always ready for the task at hand.